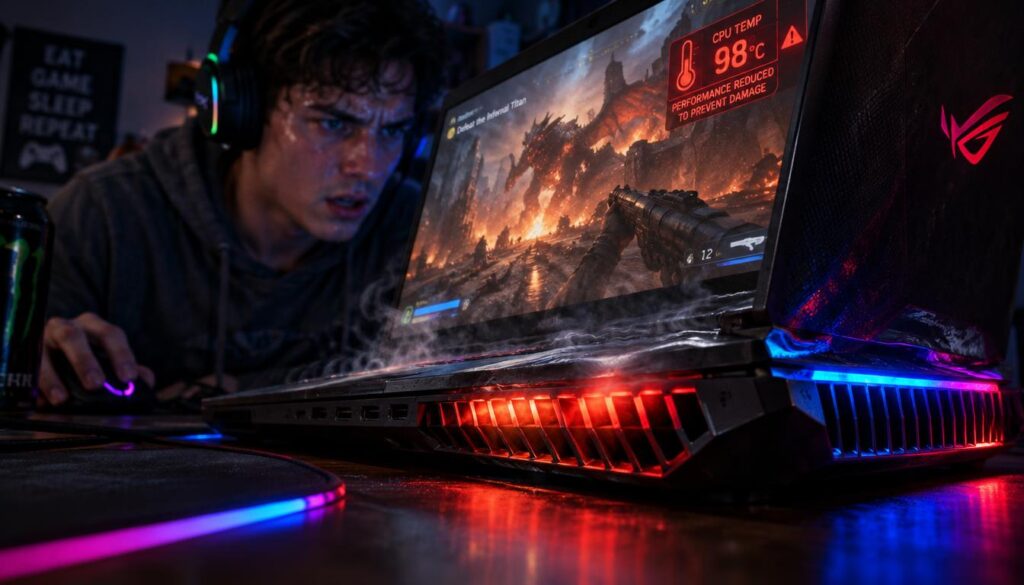
Gaming laptop overheating while gaming can make the keyboard feel like a stovetop, while fans roar like jet engines mid-match. Many serious players know the sinking feeling when frame rates drop while lining up a perfect shot.
This common problem comes from fitting high-performance components into a slim chassis and creating thermal challenges. Dust buildup, outdated software, and poor airflow make the heat worse.
I have tested many fixes on my own machine, from quick cleaning tricks to smarter power settings and hardware upgrades. For gaming laptop overheating while gaming, this guide explains why these machines run hot. It shares the practical toolkit I use to keep mine cool and ready to perform.
Key Takeaways
- Compact hardware design packs powerful parts into tight spaces, limiting airflow and raising internal temperatures.
- Dust buildup inside vents and fans is one of the most common and preventable causes of excess heat.
- Outdated drivers and background software can push your hardware harder than necessary, generating extra warmth.
- Environmental factors, like a hot room or blocked vents on a soft surface, directly affect cooling performance.
- Simple fixes, such as regular cleaning and using a cooling pad, can make a noticeable difference.
- Understanding root causes helps you choose the right long-term solution, from software tweaks to hardware upgrades.
1. Why My Gaming Laptop Overheats While Gaming
I learned that desktop-level power packed into a thin laptop shell creates serious heat. My laptop gets too hot when gaming because powerful parts sit in a tight space. I once thought it was broken, but this behavior is common in gaming laptops.
Modern gaming laptops fit serious hardware into a small footprint. The Intel Core i9 processor and NVIDIA RTX graphics card deliver desktop-level performance, but they also create massive heat. Desktop towers manage this with large fans, wide airflow channels, and open space.
My laptop does not have that luxury. Its parts sit tightly together, leaving little room for air to move around hot components.
Gaming adds another layer: it demands constant, high power from the processor and graphics card at the same time. The push for slim, portable designs helped me see that overheating is not really a flaw. It is a built-in trade-off found in nearly every high-performance gaming laptop on the market today.
2. Common Causes Behind Gaming Laptop Overheating While Gaming
Every overheating gaming laptop I’ve diagnosed has one of a few root causes. Most gaming laptop thermal issues come from mechanical wear, tight designs, and habits that trap heat. Here are the five causes I see most often, explained plainly so you can spot them yourself.
Dust Buildup in Vents and Fans
Dust and airborne particles collect inside fans and heat sinks during normal use. According to HONOR Club, this debris forms an insulating layer that traps heat instead of releasing it through exhaust vents.
I’ve opened laptops that looked spotless outside but had thick, gray buildup around the fan blades. This problem develops slowly, so you may notice extra heat only when the laptop feels much hotter.
Poor Airflow and Laptop Design Limitations
Manufacturers fit desktop-level processors and graphics cards into thin, portable chassis. This trade-off leaves little room for wide airflow channels or oversized heat sinks.
Compact design always means tighter thermal headroom. Even premium gaming laptops struggle to match desktop cooling because less space remains for air around internal components.
Degraded or Dried-Out Thermal Paste
Thermal paste sits between the CPU, GPU, and heat sinks, carrying heat away from the chips. Over time, it dries out and transfers heat less effectively.
I check this closely after a laptop passes the three-year mark. Dried thermal paste is one of the quietest thermal problems, because it worsens gradually rather than causing sudden temperature spikes.
Running Demanding Games on Maxed-Out Settings
Ultra textures, high resolutions, and ray tracing push the CPU and GPU much harder than most games require. I’ve watched frame rates barely change between high and ultra presets, while temperatures climbed several degrees.
That extra strain creates more heat than many cooling systems can handle during extended gaming sessions. These gaming laptop thermal issues often appear immediately under maxed-out settings.
Using the Laptop on Soft or Uneven Surfaces
Beds, couches, and pillows block intake vents on most gaming laptops. Once airflow stops, internal temperatures can climb quickly, sometimes within minutes.
Room conditions matter too: every 5°C increase in ambient temperature can add 3 to 8°C inside the chassis. This worsens any heat problem caused by the surface.
| Cause | How It Builds Heat | When It Becomes Noticeable |
|---|---|---|
| Dust in vents and fans | Insulating layer blocks airflow | After several months of use |
| Design limitations | Compact chassis restricts cooling space | Present from day one |
| Dried thermal paste | Reduced heat transfer to sink | Typically after 2-3 years |
| Maxed-out game settings | Higher CPU and GPU workload | Immediate during gameplay |
| Soft or uneven surfaces | Blocked intake vents | Immediate during gameplay |
3. Warning Signs My Laptop Gets Too Hot When Gaming
I learned to spot an overheating gaming laptop before serious trouble starts. These gaming laptop temperature problems rarely appear without warning, and my system usually sends several signs first.
Catching these signs early has saved me from costly repairs more than once. Here’s what I watch during every gaming session.
Performance Throttling and Sudden Frame Rate Drops
The first warning sign I notice is a sudden frame-rate drop during intense gameplay. My CPU and GPU throttle themselves when internal temperatures rise too high.
Throttling means the processors slow down on purpose to reduce heat. A smooth game can suddenly stutter or lag during a match.
This uneven performance usually points to thermal throttling, not a network issue or software bug. Temperature monitoring software confirms this quickly.
Random Shutdowns and Game Crashes
My laptop has shut down mid-game when temperatures crossed a dangerous threshold. The system forces an emergency shutdown to protect hardware from permanent damage.
Sometimes the whole laptop shuts down; other times, the game crashes to the desktop without warning. These events seem random but usually happen during demanding scenes.
I treat any unexpected crash as a strong signal that cooling needs attention. Ignoring it risks damaging the motherboard or graphics card over time.
Loud Fan Noise and a Hot Exterior
The clearest physical sign is a fan that sounds like it is working overtime. Fans spinning constantly at full speed show cooling cannot match the heat output.
I also check the keyboard and vents for unusual warmth, especially near the top row of keys. A laptop that feels uncomfortably hot is struggling, even if performance has not dropped.
Screen artifacts or random freezing often appear with this heat, confirming gaming laptop temperature problems are getting worse. I never ignore these physical signs.
4. Step 1: Clean the Vents and Internal Fans
I start every cooling fix-it list by removing dust from the vents and fans. This simple step offers reliable laptop cooling solutions for gaming laptops at almost no cost.
I treat cleaning as routine maintenance, not a last resort. Clean fans move air freely, helping every other machine part stay cooler.
Tools I Use for Safe DIY Cleaning
I keep a small cleaning kit beside my desk. Three items solve nearly every dust problem I find.
- Compressed air cans: blast loose dust out of vents and heat sinks without touching sensitive components.
- Anti-static brush: sweeps away stubborn dust clinging to fan blades and small crevices.
- Microfiber cloth: wipes down the exterior casing and keeps grime from settling near air intakes.
Before cleaning, I power down the laptop and unplug it from the wall. If the battery is removable, I remove it too.
I work on a hard, flat surface and hold each fan blade steady while spraying air. This prevents fast spinning that could damage the bearings.
How Often I Clean My Laptop’s Cooling System
My cleaning schedule depends on how often I game and where I play. Dusty rooms or pets require more frequent cleaning.
Usually, I clean the internal fans and vents every three to six months. Heavy gaming pushes me toward the shorter end, supporting laptop cooling solutions for gaming.
| Usage Type | Recommended Cleaning Interval | Suggested Method |
|---|---|---|
| Casual gamer (a few hours weekly) | Every 6 months | DIY compressed air cleaning |
| Regular gamer (daily sessions) | Every 3-4 months | DIY cleaning with brush and air |
| Heavy gamer (multiple hours daily) | Every 2-3 months | DIY cleaning plus periodic professional check |
| Dusty or pet-friendly environment | Every 1-2 months | Frequent DIY cleaning, dust-proof cover during storage |
If opening the laptop feels risky, I take it to a professional service center. Many shops offer deep cleaning every four to six months for a reasonable fee.
I use a dust-proof cover when the laptop sits unused for a while. This small habit supports laptop cooling solutions for gaming and keeps the system cleaner longer.
5. Step 2: Use a Laptop Cooling Pad
One easy upgrade to prevent gaming laptop overheating was buying a quality cooling pad. This accessory sits under my laptop and works with its internal fans to pull hot air from the chassis.
According to HONOR Club, active cooling pads with extra fans can force more airflow around a laptop. Passive cooling stands without fans still help. They can lower temperatures by 5 to 8 degrees Celsius by raising the device and improving airflow underneath.
I noticed a difference within minutes during a long gaming session. My CPU temperatures dropped steadily. My laptop’s fan also became quieter because it worked less to stay cool.
What to Look for in a Good Cooling Pad
Not every cooling pad gives the same results, so I check certain features before buying one. ASUS recommends pads with strong airflow and adjustable fan speeds. These features help during warm weather or long gaming marathons, when heat builds quickly.
- Strong airflow: Multiple fans or larger fan blades move more air across the laptop’s base for better cooling.
- Adjustable fan speeds: Lets me control cooling power based on how demanding the game is.
- Sturdy build quality: A solid frame prevents wobbling during intense keyboard and mouse use.
- Vent alignment: Matching my laptop’s intake points ensures airflow reaches where it’s needed most, which helps prevent gaming laptop overheating effectively.
6. Step 3: Elevate the Laptop for Better Airflow
Lifting my laptop off the desk made a bigger difference than I expected.
I always game on a hard, flat surface, never a bed or couch. Soft surfaces block intake vents under the chassis and trap warm air.
A basic stand or rubber risers quickly create space beneath the laptop. This gap lets cool air reach the bottom vents and helps reduce laptop heat while gaming at little cost.
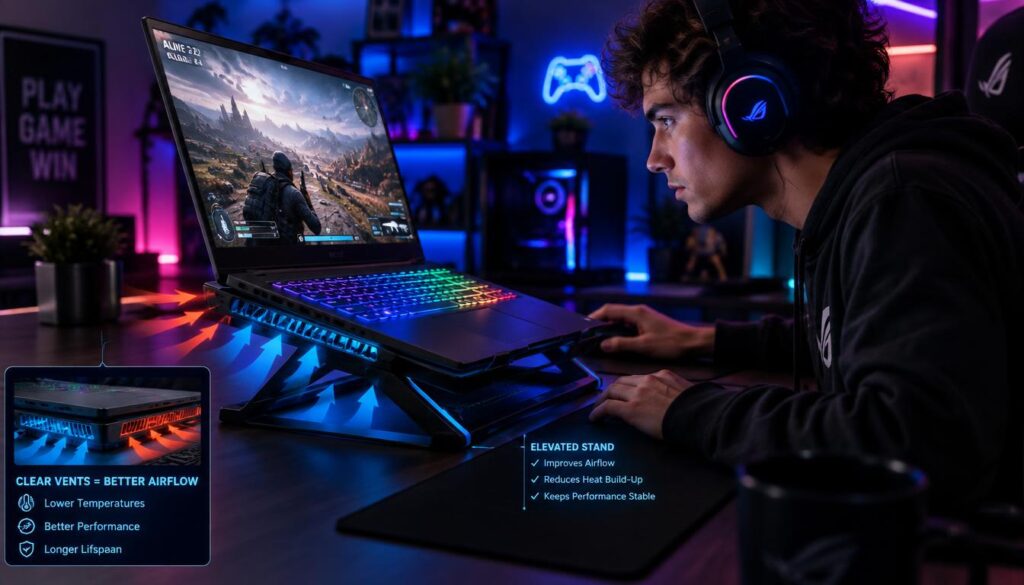
According to HONOR, raising a laptop can lower internal temperatures by 5 to 8°C. Metal stands work well because they act as heat sinks and draw warmth away from the chassis.
Here’s how each surface affects temperature:
| Surface Type | Airflow Impact | Typical Temperature Change |
|---|---|---|
| Bed or couch | Blocks intake vents completely | Up to +10°C |
| Flat desk | Allows limited airflow | Baseline temperature |
| Elevated metal stand | Maximizes vent clearance and acts as a heat sink | -5°C to -8°C |
Some gaming laptops already use this design. ASUS ROG models have up to four exhaust vents and raised rubber feet for better airflow. This design shows why elevation matters with any brand.
Overheating can affect consoles, too. If you game on consoles, this guide on fixing PS5 overheating issues explains similar airflow tips for home use.
7. Step 4: Reapply Thermal Paste
Dried thermal paste makes laptop overheating during games hard to prevent with simple surface fixes. This job is harder than cleaning dust or using a cooling pad, but it has delivered my biggest temperature drop. I try it only after simpler fixes stop working.
When Repasting Is Actually Necessary
Most manufacturers apply solid thermal paste at the factory, but it breaks down over time. HONOR Club says aging paste often causes worse heat problems, especially in gaming laptops older than three years. This includes models that once had excellent cooling systems.
I consider repasting after two to three years, or when temperatures rise despite regular cleaning and good airflow. If fans get louder and throttling continues with a clean setup, dried paste may cause laptop overheating during games.
Before opening the case, I check the warranty. Opening a laptop can void coverage, so I wait until the warranty ends or the manufacturer permits user maintenance. I assess my comfort with small screws and delicate parts, since rushing can cause bigger problems than the heat issue.
My Step-by-Step Repasting Process
Once I decide repasting makes sense, I follow the same careful routine every time:
- Power down and unplug the laptop completely, remove the battery if accessible, and let the machine cool for several minutes before opening anything.
- Remove the back panel slowly, keeping track of every screw size and placement, since laptops often use different screws for different slots.
- Clean off the old, dried paste from the CPU and GPU dies using isopropyl alcohol and a lint-free cloth, repeating until the surfaces look completely clear.
- Apply a small, pea-sized amount of fresh thermal paste to each die, spreading it just enough to cover the chip without overflowing onto nearby components.
- Reassemble the laptop in reverse order, checking that every screw and cable connector sits exactly where it belongs before powering the machine back on.
I move slowly through each step because precision matters more than speed. This process scares many people, but patience makes it a reliable fix I’ve used for laptop overheating during games.
8. Step 5: Optimize In-Game Graphics Settings
Adjusting in-game graphics became one of my favorite laptop overheating fixes for gamers seeking smooth, attractive gameplay. I needed no new hardware or repaste job to see results. Simple menu changes before a game lowered heat during long sessions.
This step costs nothing and takes only a few minutes. It is often my first recommendation for anyone with a hot, loud gaming laptop.
Lowering Resolution and Texture Quality
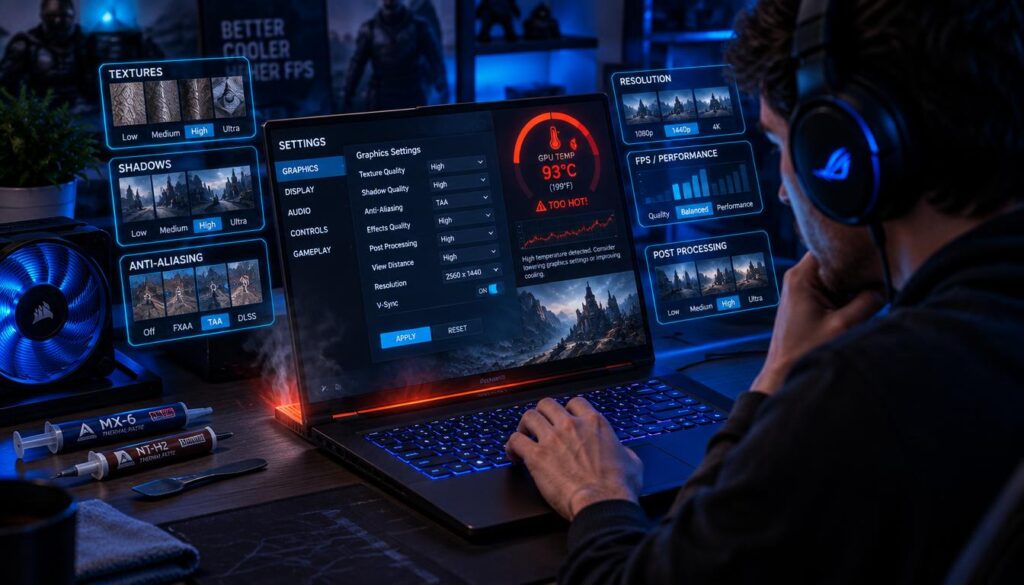
I once ran every game on ultra without thinking. After watching my GPU temperatures, I found high settings looked nearly the same. They also produced much less laptop heat.
HONOR Club’s cooling guidance supports this approach. It suggests switching from ultra to high, turning off ray tracing, and scaling resolution to 75% or 50% of native. ASUS gives similar advice: lower resolution and texture quality, then disable anti-aliasing or shadow effects.
Here’s what I usually adjust first:
- Switch from ultra to high or medium texture quality
- Turn off ray tracing and advanced shadow effects
- Disable or reduce anti-aliasing
- Drop resolution scaling to 75% or 50%
To keep sharp visuals, I enable DLSS or FSR. These tools render games at lower internal resolution, then upscale the image. The result looks close to native resolution while using less power and creating less heat.
Capping Frame Rates to Reduce Heat Output
An unrestricted GPU may boost performance, but it also creates more heat. I capped frame rates at 60 or 90 FPS instead of 150 or 200. My temperatures then stayed much more stable.
Uncapped frame rates make the GPU work at full speed during simple scenes, loading screens, or static menus. That effort creates unnecessary heat output for a visual difference I barely notice.
Most modern games include a built-in frame rate limiter in their graphics settings. I set mine to match my display’s refresh rate, usually 60Hz or 90Hz. I avoid chasing extra frames.
This change reduces fan noise and prevents thermal spikes that can cause throttling during long sessions. It is a simple, reliable laptop overheating fix that costs nothing and takes seconds to set up.
9. Step 6: Adjust Power Settings and Monitoring Software
Cleaning hardware and replacing thermal paste solve only part of the problem. Power settings and monitoring software handle the rest. I’ve found that the right balance between performance and power draw can stop a gaming laptop overheating while gaming before danger starts. This step costs nothing beyond setup time and can deliver some of the biggest temperature drops I’ve measured.
Using Manufacturer Tools Like MSI Afterburner and ASUS Armoury Crate
I use MSI Afterburner and ASUS Armoury Crate to track temperatures and adjust settings during play. Both programs let me build custom fan curves, so cooling starts before heat becomes a problem.
Armoury Crate gives me precise control over fan speed and thermal limits. Ideal gaming temperatures typically range from 85°C to 90°C. I also switch to balanced power mode when maximum performance is unnecessary. It lowers heat output and helps prevent gaming laptop overheating while gaming, with only a 10-15% performance sacrifice.
For deeper monitoring, I pair these apps with HWMonitor and Core Temp to track every CPU and GPU sensor. Modern laptops also offer AI features, such as NVIDIA WhisperMode, which balance fan noise and thermal output during long sessions. I consider my machine normal when temperatures stay between 70°C and 90°C.
| Temperature Range | Status | What It Means | Recommended Action |
|---|---|---|---|
| Below 70°C | Cool | Idle or light browsing load | No action needed |
| 70°C–90°C | Normal / Ideal | Typical gaming workload | Keep monitoring periodically |
| 90°C–95°C | High but Safe | Heavy load, fans working hard | Review fan curves, add a cooling pad |
| 95°C–100°C | Warning Zone | Approaching throttle point | Lower graphics settings, undervolt |
| 100°C and above | Critical | Throttling or shutdown risk | Stop gaming, clean vents immediately |
Undervolting the CPU and GPU Safely
Undervolting reduces the voltage my CPU and GPU receive while keeping clock speeds unchanged. Less voltage means less heat and lower power draw, often without a noticeable drop in frame rates.
I make these changes in small increments, usually 10 to 20 millivolts at a time. Then I run a stability test, such as a stress tool or demanding game session, before going further. Jumping straight to aggressive undervolt values risks crashes or an unstable system mid-match, so patience matters more than speed.
After finding a stable voltage curve, I lock it in and watch temperatures for the following week. If stuttering or crashes return, I raise the voltage slightly instead of chasing the lowest number. This adjustment has lowered my average gaming temperatures by several degrees without reducing performance.
10. Step 7: Control the Gaming Environment
It took me months to see that my room, not just my hardware, caused some cooling problems. I cleaned the vents, replaced the thermal paste, and changed every setting I could find. Still, my laptop ran hot during long sessions, so I began watching the air around me.
Keeping Room Temperature and Humidity in Check
I learned that room temperature affects heat buildup more than most people expect. According to HONOR Club, each 5°C rise in room temperature can raise internal laptop temperatures by 3 to 8°C. During heavy gaming, that increase can cause thermal throttling or a shutdown.
Now I include my room’s climate in my cooling plan. On warm days, I turn on the air conditioning before starting a game. If AC is not available, I place a small desk fan a few feet away, aimed at the laptop’s vents.
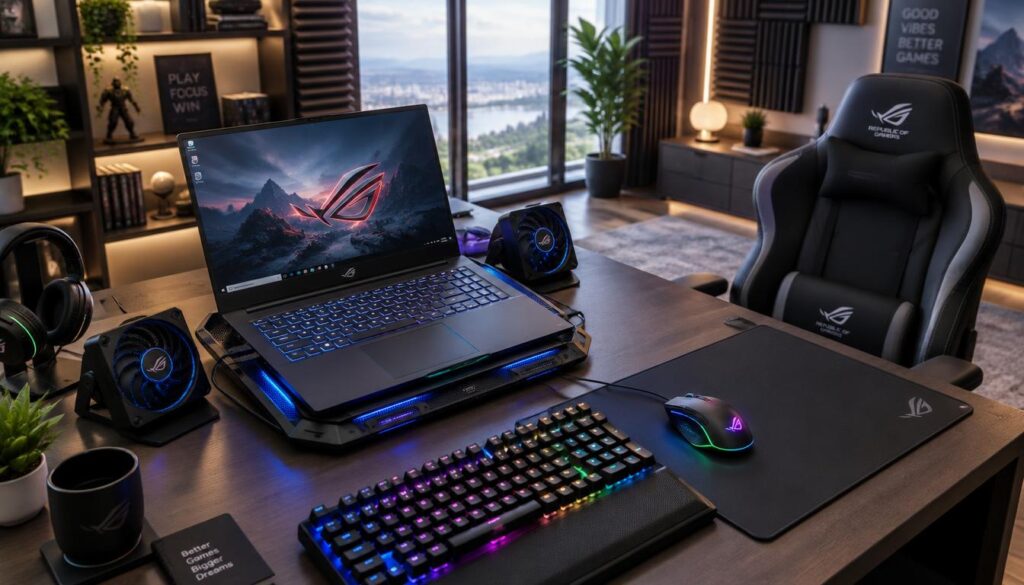
I avoid gaming near windows with direct sunlight, especially during the afternoon. Sunlight can quickly raise the surface temperature of my desk and laptop. Ventilation helps, so I open a window or run an exhaust fan when my room feels stuffy or humid.
These habits cost nothing and take only a few minutes to set up. Yet they have clearly improved my laptop’s performance during marathon sessions. Among the laptop cooling solutions for gaming I tried, managing my environment was easiest and most effective.
- Run air conditioning during peak gaming hours to lower ambient heat.
- Position a small fan near your setup for consistent airflow.
- Avoid direct sunlight on your desk or gaming area.
- Ventilate the room regularly, especially in humid climates.
11. Step 8: Upgrade Hardware for Better Long-Term Cooling
Cleaning, repasting, and smart settings solve most heat problems, but some require hardware changes. Two upgrades helped my laptop stay cool over time: more RAM and an SSD instead of a mechanical hard drive. Both changes reduce CPU strain and help prevent gaming laptop overheating during long play sessions.
Adding More RAM to Reduce Workload
When my laptop ran low on RAM, Windows swapped data to the hard drive to meet demand. This process, called memory paging, makes the CPU work harder and longer than necessary.
According to HONOR Club’s FAQ, low RAM doesn’t directly cause heat by itself. Instead, it makes the system use storage swaps, which raise power use and heat during demanding tasks.
I upgraded from 8GB to 16GB and noticed smoother multitasking almost right away. Background apps no longer competed with my game for memory, so the CPU spent less time under heavy load.
For most modern titles, 16GB is a comfortable baseline. Heavy multitaskers or streamers may benefit from 32GB instead. More RAM reduces strain and heat.
Switching to an SSD for Lower Heat Generation
My old laptop had a traditional hard drive. I realized its spinning platters produced heat only after I replaced it. Mechanical drives use moving parts that create friction and extra warmth inside a tight laptop chassis.
Solid-state drives have no moving parts, so they run cooler and draw less power. I immediately saw a lower case temperature after replacing my HDD with an SSD during long sessions with heavy loads.
Faster read and write speeds mean the system spends less time waiting for data. This keeps the CPU from working overtime. My load screens dropped from nearly a minute to just a few seconds.
This single upgrade paid off in comfort and performance. If your laptop uses a mechanical drive, an SSD can prevent gaming laptop overheating and speed up daily tasks.
| Feature | Mechanical HDD | Solid-State SSD | Impact on Heat |
|---|---|---|---|
| Moving Parts | Spinning platters and read/write heads | None, fully electronic | Fewer moving parts mean less friction-based heat |
| Power Draw | Higher, especially under load | Lower across all tasks | Reduced power draw lowers overall heat output |
| Average Operating Temp | Warmer during extended use | Stays noticeably cooler | Cooler drive means less internal case temperature |
| Load Times | Slower, more CPU wait time | Much faster, less CPU idling under load | Shorter load times reduce prolonged CPU strain |
12. Conclusion
A hot gaming laptop does not have to be a constant battle. I covered vent cleaning, cooling pads, repasting, graphics tweaks, undervolting, and hardware upgrades. Each fix helps, but combining three or four can greatly improve how your machine runs.
HONOR builds smart cooling features into its laptops, making heat management almost automatic. ASUS uses a similar approach with ROG and TUF models. ROG Intelligent Cooling adjusts performance and fan noise on the fly, so overheating rarely becomes an issue.
I do not believe gamers should accept hot, sluggish hardware as the price of strong performance. Regular maintenance and smart setting changes can help you reduce laptop heat while gaming. These habits can make gaming sessions more reliable.
Since I started using these habits, I have noticed steadier frame rates, quieter fans, and more enjoyable gaming sessions. Try a few steps, and you may notice the same difference.
FAQ
Why does my gaming laptop overheat while gaming even when it’s brand new?
In my experience, gaming laptop overheating often starts out of the box. Manufacturers pack powerful CPUs and GPUs into slim chassis with less airflow than desktop towers. New units can still run hot because their thermal design works near its limit from day one.
What usually causes laptop overheating during games?
From my troubleshooting, five issues usually cause laptop overheating during games. They include dust-clogged vents, limited airflow in slim designs, and dried-out thermal paste. Maxed-out settings, such as ultra textures and ray tracing, can also raise heat. Gaming on soft surfaces like beds or couches blocks bottom vents.
How can I tell if I’m dealing with gaming laptop thermal issues?
I watch for three clear signs of gaming laptop thermal issues: sudden frame rate drops, random shutdowns, and crashes during matches. Loud fans and a noticeably hot keyboard or chassis are also warning signs. Address cooling before damage sets in.
What should I do first when my laptop gets too hot when gaming?
I first clean the laptop thoroughly. I use compressed air, an anti-static brush, and a microfiber cloth on the vents and fans. This often improves airflow instantly and lowers temperatures.
What are the most effective ways to prevent gaming laptop overheating long-term?
I clean the cooling system every three to six months and use a quality cooling pad. I elevate the laptop on a hard surface and reapply thermal paste after two to three years. Adding RAM or switching to an SSD can also reduce long-term heat buildup.
Are cooling pads a reliable laptop cooling solution for gaming sessions?
Yes, in my experience, a good cooling pad is a reliable laptop cooling solution for gaming marathons. Choose strong airflow, adjustable fan speeds, sturdy construction, and vents aligned with your laptop’s intake points. I’ve seen temperatures drop noticeably within minutes.
What gaming laptop temperature problems should I watch for during long sessions?
I watch for internal temperatures passing 90°C and nearing the 95-100°C danger zone. I monitor these temperatures with tools like MSI Afterburner or ASUS Armoury Crate. They track real-time temperatures and let me set custom fan curves before conditions become critical.
What laptop overheating fixes for gamers don’t require opening the hardware?
My go-to laptop overheating fixes for gamers avoid disassembly. I lower resolution and texture quality, enable DLSS or FSR, and cap frame rates at 60 or 90 FPS. I also undervolt the CPU and GPU and control room temperature with air conditioning or a desk fan. These software and environmental tweaks meaningfully reduce heat while gaming without touching the internals.
Can I reduce laptop heat while gaming without sacrificing performance?
Absolutely. I reduce laptop heat while gaming with little visual trade-off. I drop settings from ultra to high and use upscaling technologies like DLSS or FSR. I cap frame rates during less demanding scenes. These changes cut GPU workload significantly while keeping gameplay largely intact.
When is reapplying thermal paste necessary to fix gaming laptop overheating while gaming?
I typically reapply thermal paste when my laptop is two to three years old. I do it sooner if temperatures rise despite regular cleaning and good airflow. This advanced fix for gaming laptop overheating while gaming requires patience and precision. I recommend it only if you can open the chassis or will use a professional service.