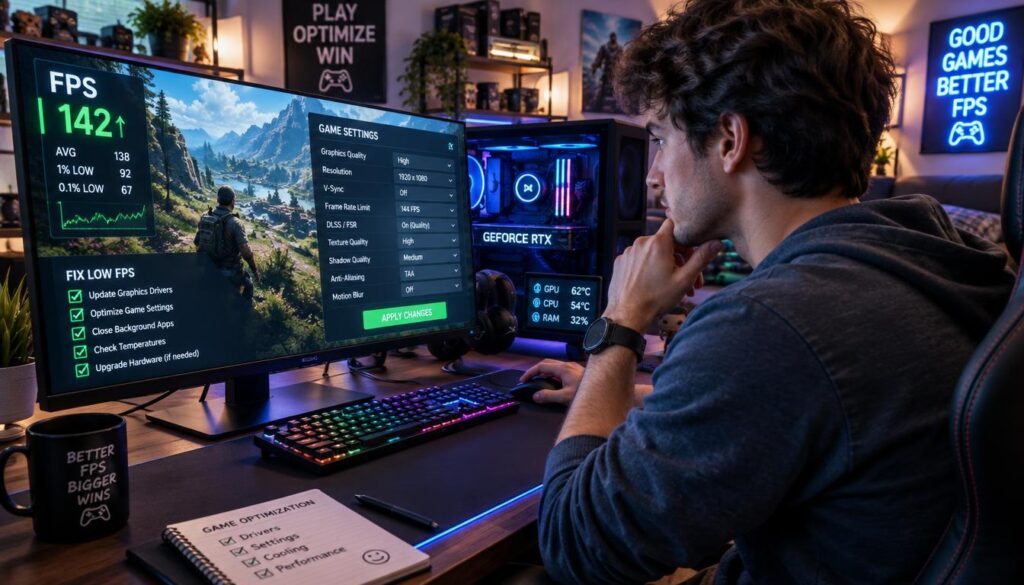
Most gamers know the frustration: a match is underway, then the screen suddenly looks like a slideshow. Low frame rates ruin the experience and can make competitive play nearly impossible. Learning how to fix low FPS in games on PC helps gamers enjoy smooth, responsive visuals.
This problem differs from internet lag. Network problems cause rubber-banding, but hardware or software struggles cause frame-rate drops while rendering images. Restarting your machine or reinstalling a title rarely fixes the root cause of these performance dips.
This guide provides a practical troubleshooting sequence for learning how to fix low FPS in games on PC. We will check system temperatures, driver updates, and Windows power settings. By testing changes methodically, you can improve performance without unnecessary or risky system modifications.
Key Takeaways
- Distinguish between network lag and hardware-related frame drops.
- Update your graphics drivers to ensure optimal compatibility.
- Monitor system temperatures to prevent thermal throttling.
- Adjust Windows power plans for maximum performance output.
- Test settings one by one to identify the specific bottleneck.
Identify What Is Causing Low FPS on Our PC
Finding the main cause of performance problems helps us enjoy smoother gameplay. When we troubleshoot fps issues, we avoid settings that cannot solve our problem.
Check Whether the Problem Is Low Average FPS or Sudden Drops
First, determine whether the frame rate stays low or drops during intense moments. A steady low frame rate often means the hardware cannot meet the game’s graphics demands.
Sudden drops often come from explosions, new areas loading, or crowded scenes. This pattern shows whether to lower settings or check for background software conflicts.
Compare GPU, CPU, RAM, and Storage Usage While Gaming
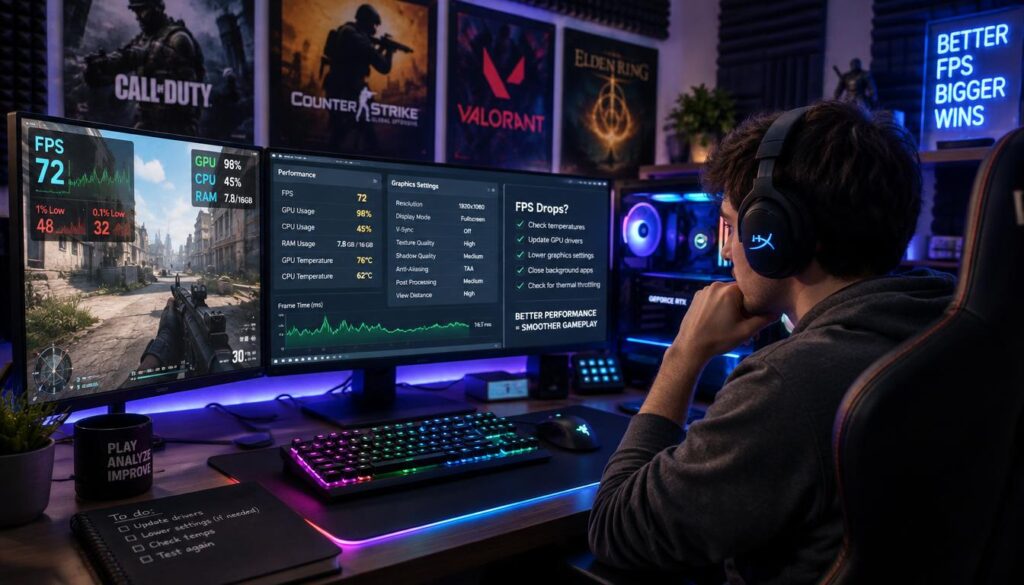
Monitoring hardware usage shows where the bottleneck is. Check these parts to find which one reaches its limit:
- GPU: High usage indicates the graphics card is working at its maximum capacity.
- CPU: High usage suggests the processor cannot keep up with game logic or physics.
- RAM: High usage means the system is running out of memory, leading to stuttering.
- Storage: Slow drive speeds can cause hitching when the game loads new assets.
Separate FPS Problems From Internet Lag and Stuttering
Network latency can look like low frame rates. Low FPS looks choppy, while internet lag causes “rubber-banding,” teleporting characters, or delayed actions.
Check ping and packet loss to rule out connection problems. If the frame rate stays steady while the character jumps around, the network is likely at fault.
Use the Xbox Game Bar, NVIDIA FrameView, or AMD Software Metrics
To troubleshoot fps issues, we need reliable data. Built-in tools can track performance in real time:
- Xbox Game Bar: Press Win + G to view the performance overlay.
- NVIDIA FrameView: Provides detailed metrics for power and frame times.
- AMD Software Metrics: Offers an in-game overlay for Radeon users to monitor hardware health.
| Metric | What It Indicates | Action Required |
|---|---|---|
| GPU Usage | Graphics Bottleneck | Lower Resolution |
| CPU Usage | Processor Limit | Close Background Apps |
| RAM Usage | Memory Shortage | Upgrade or Close Tabs |
How to fix low FPS in games on PC: Start With Essential Checks
If you need to know how to fix low fps in games on pc, begin with these basic checks. Many performance problems come from simple oversights that require no advanced skills. These checks can quickly rule out common setup errors.
Restart the PC and Close Unnecessary Programs
Restarting your PC can clear temporary glitches and free memory. Close resource-heavy apps, such as web browsers and video editors, before starting a game. Closing background tasks gives your hardware more power for the game engine.
Confirm That the Monitor Cable Uses the Dedicated Graphics Card
A common mistake is connecting the monitor cable to the motherboard instead of the dedicated graphics card. That choice activates weaker integrated graphics. Always ensure your display cable is plugged directly into the horizontal ports on your dedicated GPU.
Verify That the Game Uses the Correct GPU
Laptops and dual-graphics systems may not switch to the high-performance card automatically. Check that the game uses the dedicated GPU, not the power-saving integrated chip.
Choose the High-Performance GPU in Windows Graphics Settings
Open the Windows Graphics settings and find your game in the list. Select it, click “Options,” and choose the “High Performance” setting. This makes the system use your powerful graphics card whenever you play.
Check That the Game and Windows Meet Recommended Requirements
Confirm that your hardware meets the developer’s recommended specifications. If your CPU, RAM, or GPU falls below them, frame rates may drop despite your settings. Learning how to fix low fps in games on pc starts with checking your hardware for the specific title.
Control Heat and Power Settings to Prevent Performance Throttling
Keeping hardware cool is one of the best ways to improve gaming performance. Hot components slow themselves to prevent damage, a process called thermal throttling. Managing temperatures helps hardware maintain peak performance during long gaming sessions.
Monitor CPU and GPU Temperatures During Gameplay
Do not judge system health by idle temperatures alone. Use software like HWMonitor or MSI Afterburner to track heat during gameplay. Monitoring these metrics in real-time helps identify thermal limits during heavy loads.
Clean Dust From Case Filters, Fans, and Heatsinks
Dust acts as an insulator, trapping heat inside the PC case and making fans work harder. Use compressed air to gently clean intake filters, fan blades, and heatsink fins. Clear pathways help maintain steady airflow and improve gaming performance.
Improve Airflow Without Removing Safety Guards
Proper airflow is vital for cooling, but keep safety guards and fan grilles in place. These guards stop cables or fingers from touching spinning blades and preserve structural integrity. Organize internal cables to keep cool air moving freely.
Place the PC in a Well-Ventilated Area
The location of a desktop or laptop strongly affects how well it releases heat. Avoid enclosed cabinets or walls that block exhaust vents. Leave at least six inches of clearance around every side to improve gaming performance.
Set Windows and Laptop Power Modes to Best Performance
Windows often uses balanced power plans that favor energy savings over raw speed. Switch to the “High Performance” or “Ultimate Performance” mode in Windows Power Options. This prevents power throttling and gives the CPU and GPU the steady voltage needed for demanding tasks.
Keep Gaming Laptops Connected to AC Power
Gaming laptops need more power than batteries can provide alone. Keep your laptop plugged into a wall outlet while gaming to avoid aggressive power throttling. Staying connected to AC power is the only way to ensure the hardware runs at its full rated speed.
| Factor | Impact on Performance | Recommended Action |
|---|---|---|
| High Temperatures | Severe Thermal Throttling | Clean dust and improve airflow |
| Power Saving Mode | Reduced Clock Speeds | Switch to High Performance |
| Blocked Vents | Heat Accumulation | Relocate to open space |
| Battery Power | Limited GPU Voltage | Connect to AC power |
Update Graphics Drivers, Windows, and Game Files
Simple software updates can refresh your gaming experience. Performance often drops when outdated software prevents system parts from communicating well. Keeping everything current creates a strong foundation for high frame rates.
Install the Latest NVIDIA GeForce, AMD Radeon, or Intel Arc Driver
A regular graphics driver update is critical for every gamer. These updates optimize your GPU for modern game engines. Visit your manufacturer’s official website and download the latest version for your hardware.
Use a Clean Driver Installation When Updates Do Not Help
Installing over an old driver can leave conflicting files behind. If stuttering continues, choose a clean installation. This process removes old settings and temporary files, giving your hardware a fresh start.
Run Windows Update and Install Optional Hardware Updates Carefully
Prioritize Windows gaming updates so your operating system supports APIs like DirectX 12. Windows handles most updates automatically, but check “Optional Updates” for specific hardware drivers. Avoid unnecessary beta drivers, which can create new stability problems.
Update the Game Launcher and Its Required Components
Your game launcher provides access to your library and needs updates to work correctly. Updating Steam, Epic Games, or the Xbox app keeps background services compatible with your games. We recommend checking these settings:
- Enable automatic updates for all installed launchers.
- Check for pending updates before launching a demanding title.
- Ensure that required redistributables like Visual C++ are current.
Verify or Repair Corrupted Files in Steam, Epic Games Store, or Xbox
A crashing game or sudden frame drops may signal corrupted game files. Interrupted downloads or unexpected power losses often cause these errors. Most modern launchers can scan and fix these problems automatically.
| Launcher | Action Required | Benefit |
|---|---|---|
| Steam | Verify Integrity | Replaces missing files |
| Epic Games | Verify | Fixes installation errors |
| Xbox App | Repair | Restores app stability |
These steps help optimize your software environment for better performance. Fixing corrupted game files and updating your system removes many common causes of low FPS. Regular maintenance helps create a smooth, enjoyable gaming session.
Reduce Windows Background Activity and Startup Load
Let’s clear digital clutter that can slow gaming sessions. During play, hardware needs full power, so reduce background processes competing for CPU and memory resources.
Disable Unneeded Startup Apps and Overlays
Many apps launch when we turn on our PCs, quietly using system memory. Open Task Manager and check the Startup tab. Disable programs that are not essential for daily use.
Review Discord, Steam, Xbox Game Bar, and GeForce Experience Overlays
While gaming overlays offer chat and recording, they can add heavy graphics overhead. Disable them if you notice stuttering or frame drops during intense gameplay.
You can turn off these features in each application’s settings menu. Test your game with overlays disabled to find their effect on performance.
Pause Cloud Syncing, Downloads, and Resource-Heavy Scans
Cloud syncing and large downloads can use network and storage bandwidth. Pause these tasks before launching a game, so your system focuses on rendering frames.
Scheduled antivirus scans can also cause sudden CPU spikes. Set scans to run when you are not gaming.
Adjust Windows Visual Effects Without Disabling Useful Accessibility Features
Windows includes visual effects that look nice but use GPU cycles. Open System Properties to adjust these settings for better performance.
- Select “Adjust for best performance” to turn off animations.
- Keep accessibility features enabled if you rely on them for navigation.
- Apply changes and restart your game to see the impact on your frame rate.
Choose Game Mode and Test Hardware-Accelerated GPU Scheduling
Windows Game Mode prioritizes gaming by limiting background updates and improving resource allocation. Keep it enabled as a baseline for most modern systems.
Hardware-Accelerated GPU Scheduling may also reduce latency. It does not help every machine, so test it by turning the setting on and off. Choose the option that works best for your hardware configuration.
Optimize In-Game Graphics Settings for a Higher Frame Rate
High performance does not always mean sacrificing your game’s beauty. When we optimize graphics settings, we can keep the game sharp and the frame rate smooth.
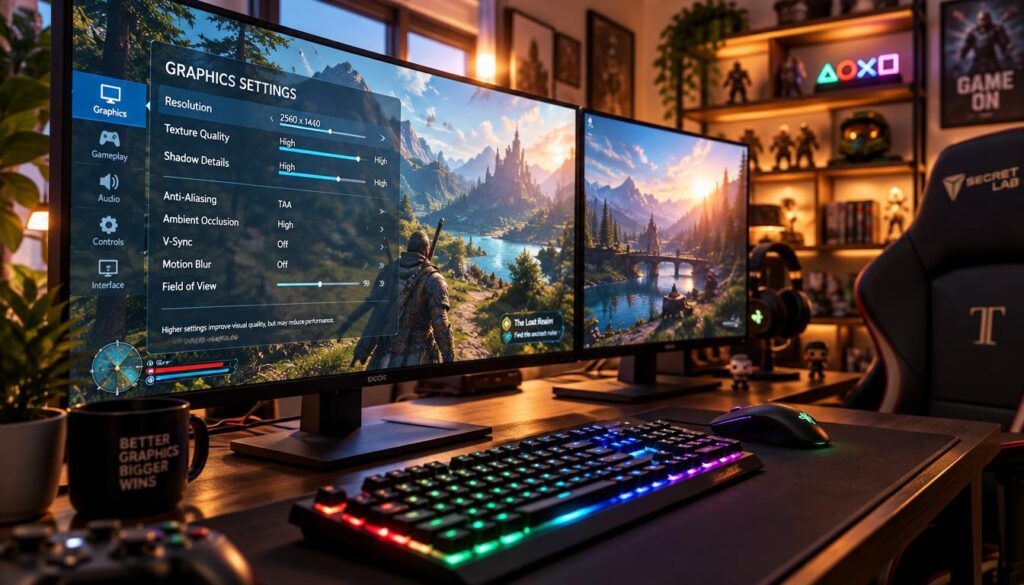
Lower the Settings That Usually Affect FPS Most
Graphics options affect performance in different ways. Finding the most demanding settings is the first step toward a better experience.
Reduce Shadows, Volumetric Effects, Reflections, and Ambient Occlusion
Shadows and lighting effects often cause low frame rates. Lower shadow resolution or disable screen-space reflections to recover GPU power.
Volumetric effects include fog and light shafts. Disable them or choose “Medium” for a large average FPS boost without ruining the atmosphere.
Adjust View Distance, Foliage, Crowd Density, and Simulation Quality
If your game slows in busy cities or dense forests, object density may cause the problem. Lower view distance so your GPU renders fewer distant objects.
Lower crowd density and foliage quality to reduce CPU workload. These settings matter most when intense gameplay causes stuttering.
Use Texture Quality According to Available VRAM
Texture quality mainly depends on your graphics card’s Video RAM (VRAM). Using “Ultra” textures with limited memory can cause severe stuttering.
Check your game’s VRAM usage meter in the settings menu. Keep usage slightly below your card’s total capacity for smoother performance.
Set Anti-Aliasing to Balance Image Quality and Performance
Anti-aliasing smooths jagged edges but can strain your system. If you miss your target frame rate, switch from MSAA to FXAA or TAA.
Turn Off Motion Blur, Film Grain, and Other Optional Effects
Post-processing effects, such as motion blur and film grain, can make images look muddy. Turn them off for clearer visuals and more available resources.
Apply Presets First, Then Fine-Tune Individual Options
The best way to optimize graphics settings is to begin with a “Medium” or “High” preset. After finding a stable baseline, adjust settings individually for your hardware.
Use the following approach to find your ideal configuration:
- Step 1: Select a global preset to establish a baseline.
- Step 2: Test the game in a demanding area to measure performance.
- Step 3: Tweak one setting at a time to see if it improves your frame rate.
- Step 4: Save your custom profile once you are satisfied with the balance.
| Setting Category | Performance Impact | Visual Impact |
|---|---|---|
| Shadows | High | Moderate |
| Volumetric Fog | Very High | High |
| Texture Quality | Low (VRAM dependent) | Very High |
| Motion Blur | Low | Subjective |
This methodical process helps you optimize graphics settings for your unique PC build. Focus on the settings that best support your personal visual experience.
Adjust Resolution, Upscaling, and Frame-Rate Limits
Adjusting pixel settings and frame delivery can improve gaming performance. Finding the right balance helps us boost frame rate effectively.
Choose a Resolution That Matches the GPU’s Performance
The number of pixels your graphics card renders directly affects performance. If your GPU struggles at its monitor’s native resolution, lower it for an immediate speed increase.
Running a game at 1080p instead of 1440p reduces your hardware’s workload. This change often allows higher settings elsewhere while keeping gameplay responsive.
Use NVIDIA DLSS, AMD FSR, or Intel XeSS When Supported
Modern upscaling tools render games at a lower internal resolution, then sharpen the image. They can boost frame rate without sacrificing much visual clarity.
Select Quality, Balanced, or Performance Modes Based on the FPS Target
Most upscaling menus offer presets for image quality or raw speed. Choose a mode based on your hardware and target frame rate.
| Mode | Visual Quality | Performance Gain |
|---|---|---|
| Quality | Highest | Moderate |
| Balanced | Good | High |
| Performance | Standard | Maximum |
Set a Stable Frame-Rate Cap Instead of Chasing Unstable Peaks
Chasing the highest frame rate can cause stuttering and uneven performance. Set a stable frame-rate cap for smoother gameplay during intense scenes.
Limit your frames to match your monitor’s capabilities and reduce unnecessary GPU strain. This can boost frame rate stability and lower system temperatures.
Match the Game’s Refresh Rate to the Monitor
Match your game settings to your monitor’s refresh rate to prevent tearing and visual artifacts. Most modern displays support high refresh rates for smoother motion.
Enable Variable Refresh Rate With G-SYNC Compatible or FreeSync Displays
Variable Refresh Rate (VRR) synchronizes your monitor’s refresh rate with GPU frames. It eliminates stutter and tearing without the input lag of traditional V-Sync.
Test V-Sync, Enhanced Sync, and Low-Latency Options Separately
V-Sync prevents screen tearing but can add noticeable input lag. Test NVIDIA Reflex or AMD Anti-Lag to find a better feel for your setup.
Test these settings one at a time to find the best combination for your hardware. The right configuration can boost frame rate and create smoother gameplay.
Configure NVIDIA, AMD, or Intel Graphics Settings for Gaming
Dedicated GPU software can help stabilize gaming performance. It can also unlock more frames through driver settings beyond standard game menus.
Set Per-Game Profiles Instead of Changing Every Global Setting
Changing global settings may cause unexpected conflicts. Use per-game profiles so tweaks affect only the title you play.
Individual profiles maintain a stable baseline for our system. They stop one game’s needs from hurting another game’s performance.
Use NVIDIA Control Panel Settings for Power and Latency
The NVIDIA Control Panel gaming settings control GPU power and input delay. They help in competitive titles, where every millisecond matters.
Test Prefer Maximum Performance and Low Latency Mode
Test the “Prefer Maximum Performance” mode to keep GPU clock speeds high. Enabling “Low Latency Mode” can reduce delay between mouse clicks and screen action.
Use AMD Software: Adrenalin Edition Features Carefully
The AMD Adrenalin settings suite includes tools that can raise frame rates and improve response. Enabling every feature at once may cause instability.
Test Radeon Anti-Lag, Radeon Chill, and Radeon Boost One at a Time
Enable these features one at a time to see how they affect your setup. Radeon Anti-Lag reduces input delay, while Radeon Chill manages power and Radeon Boost dynamically adjusts resolution during fast movement.
Configure Intel Graphics Command Center Settings on Intel Arc Systems
For Intel Arc gaming settings, the Graphics Command Center offers a clear optimization interface. We can adjust texture filtering and adaptive sync to balance performance on our hardware.
Return Experimental Settings to Default if Stuttering Gets Worse
A setting that promises higher performance may cause frame pacing problems or stuttering. If the game feels less smooth, restore those settings to their defaults at once.
Recording changes helps identify useful and harmful settings. Reliability is just as important as raw frame rate for enjoying our favorite games.
Fix FPS Drops, Stuttering, and Performance Problems in Specific Games
Persistent stuttering in one title calls for game-specific fixes. These fps drop solutions target how your hardware works with that game’s engine, not general system settings.
Clear Shader Caches When Stutters Begin After a Driver Update
Graphics drivers store pre-compiled shaders to speed loading. After a GPU driver update, the old cache may conflict with the new software. Clear it so the game rebuilds the files and often fixes micro-stutters.
Allow Shader Compilation to Finish Before Serious Testing
Many modern games run a “shader compilation” step during the first launch or after a major update. Let this process finish before benchmarking or playing. Interrupting it can cause permanent stuttering during gameplay.
Run the Game as Administrator Only When Permissions Cause a Problem
Running a game as administrator gives it full access to system files. This may fix permission-related crashes, but it does not boost performance universally. Use it only when the game may struggle to write save files or configuration data.
Disable Conflicting Mods, Reshade Filters, and Unofficial Tweaks
Third-party modifications and visual filters can sharply lower your frame rate. During testing, disable them to check whether they cause performance problems. Re-enable each tool separately to find the mod causing the conflict.
Test DirectX 11, DirectX 12, or Vulkan When the Game Supports Multiple APIs
Modern games may offer different graphics APIs. Each API interacts differently with your hardware, so one may perform much better on your setup.
- DirectX 11: Often more stable for older hardware.
- DirectX 12: Better for modern GPUs but can cause initial stuttering.
- Vulkan: Frequently provides the best frame times on AMD hardware.
Keep the API That Produces the Most Stable Frame Times
Do not automatically choose the newest API. Test each option and monitor frame times to find the smoothest experience. Choose consistent performance, even when an older API works best.
Use a Clean Game Configuration File When Settings Become Corrupted
A corrupted configuration file can cause strange performance dips. Delete the local config file and let the game create a fresh one at the next launch. This is one of the most effective fps drop solutions for games heavily tweaked or modified over time.
Measure Frame Times and Confirm Which Fixes Work
After applying tweaks, we need to check whether they improved our gaming experience. Guesswork rarely proves that our hardware works better. These pc gaming performance tips help separate placebo effects from real technical gains.
Record Average FPS, One-Percent Lows, and Frame-Time Spikes
Average frames per second can hide stuttering. Focus on one-percent lows, which show frames that cause noticeable hitches. Frame-time spikes reveal when the game engine struggles to keep up.
Test the Same Area, Resolution, and Graphics Preset Each Time
Reliable data requires consistent tests. Return to the same in-game location with identical settings each time. Then, comparisons stay fair and accurate.
Change One Setting at a Time to Avoid Misleading Results
Changing several options at once makes results hard to explain. Adjust one setting, then run the benchmark again. This method is one of the best pc gaming performance tips for finding problems.
Keep a Short Record of Each Change and Its Performance Result
Keep a simple log of each adjustment. Record the change and its frame rate result so you remember what you tested. This habit saves time during long troubleshooting sessions.
Compare GPU Utilization and CPU Core Usage During a Drop
When performance suddenly drops, check your hardware monitoring tools. Individual CPU core usage can show one core reaching 100% while others stay idle. GPU utilization shows whether the graphics card works fully or is held back by other components.
Recognize a CPU Bottleneck, GPU Bottleneck, or Memory Limitation
Knowing where our system fails is vital for long-term stability. A GPU bottleneck often calls for lower graphics settings, while a CPU bottleneck may require closing background apps. Use the table to classify findings and apply the right pc gaming performance tips.
| Metric Observed | Likely Bottleneck | Recommended Action |
|---|---|---|
| GPU Usage > 95% | Graphics Card | Lower Resolution or Textures |
| CPU Usage > 90% | Processor | Close Background Processes |
| High RAM Usage | System Memory | Upgrade RAM or Close Apps |
| Low GPU/CPU Usage | Frame Cap/Sync | Disable V-Sync or FPS Limit |
Use Advanced Fixes or Upgrade Hardware When Necessary
When optimization reaches a wall, we should examine our hardware configuration. Software settings fix many issues, but some limits come from our physical components. We should consider advanced steps only after confirming our setup causes the problem.
Enable XMP or EXPO Memory Profiles Only After Checking Stability
Many systems run memory at slower default speeds out of the box. Enabling XMP or EXPO profiles in the BIOS unlocks our RAM’s rated speed. Always perform a stability test after these changes so the system does not crash during intense gaming sessions.
Consider Adding RAM When Games Exceed Available System Memory
Constant stuttering during multitasking or open-world games may signal that a RAM upgrade for gaming could help. Modern games often require more than 16GB of memory for smooth frame times. More capacity keeps the system from using slower storage drives to swap data.
Move Games From a Hard Disk Drive to an SSD
Slow mechanical hard drives often cause long loading times and texture pop-in. An SSD gaming upgrade helps assets load into memory much faster. It also reduces stuttering when the game engine struggles to fetch data from a sluggish drive.
Upgrade the GPU for Higher Resolution and Ray-Tracing Performance
To play at higher resolutions or use advanced lighting effects, we usually need a GPU upgrade. A stronger graphics card handles complex rendering tasks more easily. It helps maintain high frame rates when visual settings reach their limits.
Upgrade the CPU When It Limits High-Refresh-Rate Gaming
Sometimes, our graphics card is not the problem. With a CPU bottleneck, the processor cannot meet the game’s frame rate demands. A faster processor lets our GPU perform at its full potential.
Check Motherboard Compatibility, Power Supply Capacity, and Cooling Before Buying
Before buying parts, we must verify that each one fits our current build. We should confirm these details:
- Ensure the motherboard socket supports the new CPU.
- Verify that our power supply has enough wattage for the new GPU.
- Check that our case has enough physical clearance for larger components.
- Confirm that our cooling solution can handle the increased thermal output.
Undo Overclocks or Undervolts That Cause Crashes and Frame-Time Spikes
We may push hardware beyond factory limits for extra performance. Unstable overclocks often cause micro-stuttering and sudden system crashes. If frame times become inconsistent, it is better to revert to stock settings.
Conclusion
A smooth gaming session begins when you identify your specific hardware bottleneck. Check temperatures, update drivers, and manage background tasks to control system resources. This systematic approach saves time and prevents unnecessary spending on new components.
A stable frame rate with consistent timing will enhance gameplay experience more than high, erratic numbers. Test one setting at a time to learn what truly affects performance. This method creates a reliable foundation for troubleshooting any title in your library.
Upgrade hardware only after exhausting all software optimizations. Understanding your PC’s limits helps you decide when to buy a new GPU or extra RAM. We hope this guide helps you maintain a fluid, responsive environment that keeps your focus on the game itself.
FAQ
How to fix low fps in games on pc when the game used to run fine?
Check recent changes, such as a Windows update or new driver installation. If performance suddenly dropped, check temperatures and clear dust from fans.
Also check whether new background applications are using your CPU or RAM.
What is the fastest way to improve gaming performance on an older system?
Use upscaling technologies like NVIDIA DLSS or AMD FSR. If unavailable, lower resolution and reduce shadows and reflections.
These changes usually provide the biggest increase in frames per second.
Why should we optimize graphics settings instead of just using the “Low” preset?
The “Low” preset may disable features that have little performance impact while making the game look worse. Manual adjustments offer better control.
Keep high-quality textures when you have enough VRAM. Turn off demanding volumetric effects for better visuals at the same frame rate.
How can we troubleshoot fps issues that feel like stuttering?
Stuttering often comes from inconsistent “frame time,” not just low FPS. Cap frame rate to your monitor’s refresh rate.
Install the game on an SSD. This reduces hitches when a slow hard drive loads new assets.
Does Windows Game Mode actually boost frame rate?
Game Mode helps most when many background processes run. It prioritizes the game and pauses update notifications.
It may not add 20 FPS, but it can prevent sudden drops during gameplay.
Are there specific fps drop solutions for gaming laptops?
Keep your laptop plugged into the wall. Most laptops greatly limit GPU and CPU power on battery to save energy.
A cooling pad or raised laptop back can improve airflow. This may prevent thermal throttling and performance loss.
Which pc gaming performance tips are most important for competitive shooters?
For Valorant or Counter-Strike 2, prioritize “Low Latency” settings over visual effects. Enable NVIDIA Reflex or AMD Anti-Lag.
Consider lowering graphics settings so FPS stays above your monitor’s refresh rate. This reduces input delay.
How do we enhance gameplay experience if our FPS is high but the game still feels “off”?
This may be a sync issue. Check that Windows uses your monitor’s correct refresh rate, such as 144Hz instead of 60Hz.
G-SYNC or FreeSync matches the monitor’s refresh rate to GPU output. This removes tearing and makes motion smoother.